Building Docker Image for Cross Platform(ARM64, ARM)

Building Docker Image for Cross Platform

arm64 머신과 x86 머신에서 동작해야 하는 프로젝트를 진행하게 되었다. 동일한 소스 트리를 유지하지 위해 하나의 아키텍처로 작업하는 경우 보다 더 많은 노력이 팔요하지만 프로젝트 진행 중 가장 귀찮(짜증나는)은 작업은 테스트를 위해 arm64과 x86 머신에서 이미지를 따로 빌드 해야 하는 것이었다.

개발 서버(PC)에서 ARM 이미지를 빌드 하는 방법을 찾던 중 qemu의 arm emulation 기능을 이용하여 x86 머신에서 arm용 Docker 이미지를 Cross Build 하는 방법을 찾아 공유한다.

Install Docker

sudo apt update
sudo apt dist-upgrade
curl -fsSL test.docker.com -o get-docker.sh && sh get-docker.sh

And add current user to docker group

sudo usermode -aG docker $USER

Install buildx for multi-architecture image build

DOCKER_CLI_EXPERIMENTAL 옵션이 Enabled 되어 있어야 사용할 수 있다. 아래와 같이 환경변수를 설정해 주면 된다.

export DOCKER_CLI_EXPERIMENTAL=enabled

아니면 ~/.docker/config.json 파일에 아래와 같이 "experimental": "enabled"추가 하자.

{
	"auths": {
		"https://index.docker.io/v1/": {
			"auth": "******************"
		}
	},
	"HttpHeaders": {
		"User-Agent": "Docker-Client/19.03.12 (linux)"
	},
	"experimental": "enabled"
}

Download a buildx binary release

다음 사이트에서 최신 바이너리를 다운 받아 ~/.docker/cli-plugin 디렉터리에 넣는다.

mkdir -p ~/.docker/cli-plugin
curl https://github.com/docker/buildx/releases/download/v0.4.2/buildx-v0.4.2.linux-amd64 > ~/.docker/cli-plugin/docker-buildx
chmod +x ~/.docker/cli-plugin/docker-buildx

Enable ARM Cross Build

ARM을 활용하여 적당한 빌드 시스템을 구성하기가 어렵다. 라즈베리 파이(Raspberry Pi)등으로 빌드 머신을 만들 있지만 낮은 성능으로 인해 하루종일 이미지만 빌드 하는 체험을 할 수 있다. x86 시스템을 이용하여 Cross Build 하는 것이 더 빠른 경우가 더 많다.

아래와 명령을 실행하여 ARM Emulation 기능을 Enable하자.

docker run --rm --privileged linuxkit/binfmt:v0.8

아래와 명령을 통해 기능을 확인한다.

cat /proc/sys/fs/binfmt_misc/qemu-aarch64

다음과 비슷한 결과가 나온다

enabled
interpreter /usr/bin/qemu-aarch64
flags: OCF
offset 0
magic 7f454c460201010000000000000000000200b7
mask ffffffffffffff00fffffffffffffffffeffff

Create Multi-Architecture build instance

Using QUEM Emulation

빌드 환경을 구성한다.

docker buildx create --name cross
docker buildx use cross
docker buildx inspect --bootstrap
Name:   cross
Driver: docker-container

Nodes:
Name:      cross-builder0
Endpoint:  unix:///var/run/docker.sock
Status:    running
Platforms: linux/amd64, linux/arm64, linux/riscv64, linux/ppc64le, linux/s390x, linux/386, linux/arm/v7, linux/arm/v6

Using Native Build Machine

성능 좋은 ARM용 빌드 머신이 있는 경우 해당 빌드 머신을 사용하면 된다.

편의상 ARM용 빌드 머신을 build-arm 이라고 하자

~/.ssh/config 파일을 열어 다음과 같이 접속 정보를 추가 한다.

IP 주소인 1.2.3.4 와 Username user는 환경에 맞게 수정한다.

Host build-arm 1.2.3.4
    Hostname 1.2.3.4
    User user
    Port 22
    SendEnv LANG LC_*
    IdentityFile ~/.ssh/build-arm
    ConnectTimeout 0
    HashKnownHosts yes
    GSSAPIAuthentication yes
    GSSAPIDelegateCredentials no

ssh-keygen 명령을 통해 ssh key를 생성한다.

ssk-keygen -t ras -b 4096 -f build-arm

Public Key를 build-arm으로 복사한다.

cp build-arm.pub build-arm:.ssh/authorized_keys

Private 파일을 ~/.ssh 디렉터리도 복사한다.

ssh build-arm ~/.ssh/build-arm

Passowrd 없이 접속 되는지 확인한다.

ssh build-arm

Create buildx instance

먼저 build-arm 머신에 대한 docker context를 생성한다.

docker context create build-arm --docker "host=ssh://build-arm"

빌드 머신build-armbuildx instance에 추가 한다.

docker buildx create --append --name cross-builder build-arm

Build Docker images

이제 buildx 확장을 명령을 이용하여 Docker 이미지를 생성해 보자.

아래는 테스트에 사용될 Dockerfile 예제이다.

FROM alpine:edge
LABEL maintainer="E.K. KIM euikook@gmail.com"

COPY apps /apps
WORKDIR  /apps

buildx를 이용하여 이미지를 빌드한다. 아래 예제는 linux/arm64,linux/amd64 Architecture에 사용가능한 이미지를 생성하는 예이다. 적용 가능한 Platform 은 docker buildx inspect 명령으로 확인 하였을 때 Platforms에 나열되어있는 Platform만 가능하다.

docker buildx build --push --platform linux/arm64,linux/amd64 --tag euikook/multi-arch-test:latest .

위 buildx build 명령은 –push 옵션과 같이 사용해야 된다. 당연하게도 위 명령이 로컬 이미지를 생성하지는 않는다. 따라서 생성된 이미지를 테스트 하기 위해서는 docker pull 명령으로 이미지를 다운로드 받아야 한다.

docker pull euikook/multi-arch-test:latest 이게 이미지가 로컬 머신에 없으면 상관 없는데 docker build 나 docker-compose build명령으로 이미지를 생성한 다음 buildx 명령으로 이미지를 생성한 경우 docker pull 명령으로 이미지를 명시적으로 다운받지 않으면 이전에 생성했던 이미지가 실행되어 원하는 결과을 얻을 수 없다.

여기를 방문하면 linux/amd64, linux/arm64 이미지를 확인 할 수 있다.

References

HOWTO install LDAP Server

HOWTO install LDAP Server

본 포스트는 OpenLDAP을 사용하고자 하는 분들에게 도움을 주고자 작성 되었습니다.

Prerequisite

패키지 리스트를 최신으로 업데이트한다.

sudo apt-get update

Important notes

# Configure vim as default editor
sudo apt-get install -y vim
sudo update-alternatives --set editor /usr/bin/vim.basic

LDAP에 사요할 Domain Name을 /etc/hosts 파일에 추가한다.

sudo editor /etc/hosts

다음과 같이 추가한다.

127.0.1.1 ldap.oneuon.com ldap ldap.oneuon.com

OpenLDAP 과 관련 유틸리티를 설치한다.

sudo apt-get install slapd ldap-utils -y

This will prompt a setup window so we need to populate it with the correct credentials.

When asked for administrator password use ************. Repeat the password to confirm it.

We will use the advantage of slapd setup to fully configure LDAP instead of filling in the details by hand in a text file:

sudo dpkg-reconfigure slapd

Answer the following questions:

You will be asked to omit OpenLDAP server configuration: No Under DNS domain name fill in: oneuon.com Under organization name fill in: oneuon Inc. Under administrator password fill in: ************ Repeat password: ************ Database backend to use, select: HDB Do you want database to be removed when slapd is purged: Yes Move old database, choose: Yes Allow LDAPv2 protocol, choose: No

** If at any point you get the error: **

ldap_bind: Invalid credentials (49)

configure slapd again.

Next, add index to make lookup easier, create a file index.ldif

editor index.ldif

and populate with the following:

dn: olcDatabase={1}hdb,cn=config
changetype: modify
add: olcDbIndex
olcDbIndex: uid eq,pres,sub

and add it to ldap database:

sudo ldapmodify -Q -Y EXTERNAL -H ldapi:/// -f index.ldif

This should produce the following output:

modifying entry "olcDatabase={1}hdb,cn=config"

If this is not the case recheck your steps and try again.

You can verify that all is working:

sudo ldapsearch -Q -LLL -Y EXTERNAL -H ldapi:/// -b cn=config '(olcDatabase={1}hdb)' olcDbIndex

This should produce the following output:

dn: olcDatabase={1}hdb,cn=config
olcDbIndex: objectClass eq
olcDbIndex: uid eq,pres,sub

If this is not the case recheck your steps and try again.

Next step is to create an ldap user. Create base.ldif

editor base.ldif

and populate with:

dn: ou=Users,dc=oneuon,dc=com
objectClass: organizationalUnit
ou: Users

dn: ou=Groups,dc=oneuon,dc=com
objectClass: organizationalUnit
ou: Groups

dn: cn=miners,ou=Groups,dc=oneuon,dc=com
objectClass: posixGroup
cn: miners
gidNumber: 5000

dn: uid=euikook,ou=Users,dc=oneuon,dc=com
objectClass: organizationalPerson
objectClass: person
objectClass: top
objectClass: inetOrgPerson
objectClass: posixAccount
objectClass: shadowAccount
uid: euikook
sn: KIM
givenName: E.K.
cn: E.K. KIM
displayName: E.K. KIM
uidNumber: 10000
gidNumber: 10000
userPassword: test
gecos: E.K. KIM
loginShell: /bin/bash
homeDirectory: /home/euikook
mail: euikook@oneuon.com
telephoneNumber: 000-000-0000
st: NY
manager: uid=euikook,ou=Users,dc=oneuon,dc=com
shadowExpire: -1
shadowFlag: 0
shadowWarning: 7
shadowMin: 8
shadowMax: 999999
shadowLastChange: 10877
title: System Administrator

Add the user to the LDAP database:

ldapadd -x -D cn=admin,dc=gitlab,dc=dev -w gitlabldap -f base.ldif

This should produce the following output:

adding new entry "ou=Users,dc=oneuon,dc=com"

adding new entry "uid=euikook,ou=Users,dc=oneuon,dc=com"

If this is not the case recheck your steps and try again.

To confirm that the user is in LDAP, use:

ldapsearch -x -LLL -b dc=oneuon,dc=com 'uid=euikook' uid uidNumber displayName mail

and that should produce the output that looks like:

dn: uid=euikook,ou=Users,dc=oneuon,dc=com
uid: euikook
displayName: E.K. KIM
uidNumber: 10000

This would complete setting up the OpenLDAP server. Only thing that is left to do is to give the correct details to GitLab. Under gitlab.yml there is a LDAP section that should look like this:

  ## LDAP settings
  ldap:
    enabled: true
    host: 'ldap.oneuon.com'
    base: 'dc=oneuon,dc=com'
    port: 389
    uid: 'uid'
    method: 'plain' # "ssl" or "plain"
    bind_dn: 'dc=oneuon,dc=com'
    password: 'gitlabldap'

Navigate to gitlab source directory and start the GitLab instance with:

bundle exec foreman start

If you now navigate to http://192.168.3.14:3000/ and fill in the sign in page under the LDAP section with:

username: euikook password: test

you will be authenticated with OpenLDAP server and logged into GitLab.

Logging

Activity logging for slapd is indispensible when implementing an OpenLDAP-based solution yet it must be manually enabled after software installation. Otherwise, only rudimentary messages will appear in the logs. Logging, like any other slapd configuration, is enabled via the slapd-config database.

OpenLDAP comes with multiple logging subsystems (levels) with each one containing the lower one (additive). A good level to try is stats. The slapd-config man page has more to say on the different subsystems.

Create the file logging.ldif with the following contents:

dn: cn=config
changetype: modify
replace: olcLogLevel
olcLogLevel: stats

Implement the change:

sudo ldapmodify -Q -Y EXTERNAL -H ldapi:/// -f logging.ldif

This will produce a significant amount of logging and you will want to throttle back to a less verbose level once your system is in production. While in this verbose mode your host’s syslog engine (rsyslog) may have a hard time keeping up and may drop messages:

rsyslogd-2177: imuxsock lost 228 messages from pid 2547 due to rate-limiting You may consider a change to rsyslog’s configuration. In /etc/rsyslog.conf, put:

# Disable rate limiting
# (default is 200 messages in 5 seconds; below we make the 5 become 0)
$SystemLogRateLimitInterval 0

And then restart the rsyslog daemon:

sudo service rsyslog restart

LDAP TLS

When authenticating to an OpenLDAP server it is best to do so using an encrypted session. This can be accomplished using Transport Layer Security (TLS).

Here, we will be our own Certificate Authority and then create and sign our LDAP server certificate as that CA. Since slapd is compiled using the gnutls library, we will use the certtool utility to complete these tasks.

Install the gnutls-bin and ssl-cert packages:

sudo apt-get install gnutls-bin ssl-cert

Create a private key for the Certificate Authority:

sudo sh -c "certtool --generate-privkey > /etc/ssl/private/cakey.pem"

Create the template/file /etc/ssl/ca.info to define the CA:

cn = Netvision Telecom Inc.
ca
cert_signing_key

Create the self-signed CA certificate:

sudo certtool --generate-self-signed \
--load-privkey /etc/ssl/private/cakey.pem \ 
--template /etc/ssl/ca.info \
--outfile /etc/ssl/certs/cacert.pem

Make a private key for the server:

sudo certtool --generate-privkey \
--bits 1024 \
--outfile /etc/ssl/private/ldap_slapd_key.pem

Replace ldap in the filename with your server’s hostname. Naming the certificate and key for the host and service that will be using them will help keep things clear.

Create the /etc/ssl/ldap.info info file containing:

organization = Example Company
cn = ldap01.example.com
tls_www_server
encryption_key
signing_key
expiration_days = 3650

The above certificate is good for 10 years. Adjust accordingly.

Create the server’s certificate:

sudo certtool --generate-certificate \
--load-privkey /etc/ssl/private/ldap_slapd_key.pem \
--load-ca-certificate /etc/ssl/certs/cacert.pem \
--load-ca-privkey /etc/ssl/private/cakey.pem \
--template /etc/ssl/ldap01.info \
--outfile /etc/ssl/certs/ldap_slapd_cert.pem

Create the file certinfo.ldif with the following contents (adjust accordingly, our example assumes we created certs using https://www.cacert.org):

dn: cn=config
add: olcTLSCACertificateFile
olcTLSCACertificateFile: /etc/ssl/certs/cacert.pem
-
add: olcTLSCertificateFile
olcTLSCertificateFile: /etc/ssl/certs/ldap_slapd_cert.pem
-
add: olcTLSCertificateKeyFile
olcTLSCertificateKeyFile: /etc/ssl/private/ldap_slapd_key.pem

Use the ldapmodify command to tell slapd about our TLS work via the slapd-config database:

sudo ldapmodify -Y EXTERNAL -H ldapi:/// -f /etc/ssl/certinfo.ldif

Tighten up ownership and permissions:

sudo adduser openldap ssl-cert
sudo chgrp ssl-cert /etc/ssl/private/ldap_slapd_key.pem
sudo chmod g+r /etc/ssl/private/ldap_slapd_key.pem
sudo chmod o-r /etc/ssl/private/ldap_slapd_key.pem

Restart OpenLDAP:

sudo service slapd restart

Check your host’s logs (/var/log/syslog) to see if the server has started properly.

Insync 3.x auto start with xvfb and systemctl

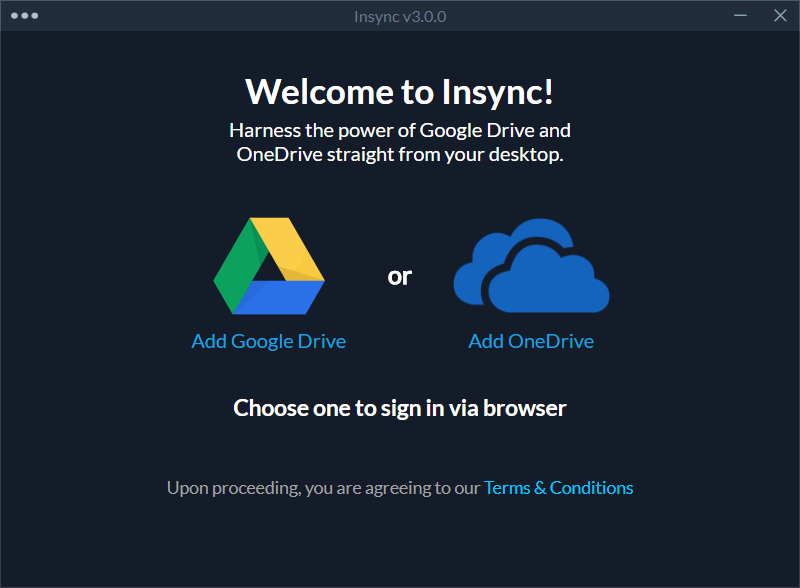
이 글에서는 Google Drive 와 One Drive의 third-party 동기화 유틸인 Insync의 headless 버전을 설치 하고 자동 실행 하는 방법에 대하여 알아본다.

Insync: Google Drive Syncing Application for Linux

Insync: 리눅스를 위한 Google Drive 동기화 어플리케이션

Insync가 3.x 버전으로 판올림 되면서 headless 버전이 없어 졌기 때문에 Gnome등의 UI로 로그인 하여야 Insyc를 설행 할 수 있다.

하지만 서버의 경우 자동 로그인을 실행하면 보안 상의 문제가 있으므로 자동 로그인 설정을 할 수 없다.

이문제를 해결 하기 위하여 xvfb와 systemctl 을 이용하여 Insync UI 버전을 자동 실행하는 방법에 다여 알아본다.

3.x 버전의 Headless 버전이 릴리즈 되었다. 이를 이용한 자동 실행 방법은 다음 Insync 3.x auto start with systemctl를 참고한다.

Desktop 버전 라이센스로 같이 사용할 수 있을 줄 알았는데. 서버용 라이센스를 별도로 구매 해야 한다. WTF 그것도 시작 가격이 일년 39.99 달러, 거기다 나처럼 Google Workspace를 사용하여 gmail.com 이 아닌 커스텀 도메인 을 사용하는 사람은 일년에 159.99 달러다. 이글을 참고 하여 Insync Desktop 버젼을 자동실행 하는 방법을 사용하자.

Prerequisites

  • insync
  • xvfb

Insync 설치

Insync의 설치 방법은 Insync - Linux에서 Google Drive Desktop Client 사용하기를 참고 한다.

xvfb 설치

sudo apt install xvfb

Systemctl script

xvfb

Create a file /home/euikook/.config/systemd/user/xvfb.service

[Unit]
Description=X Virtual Frame Buffer Service
After=network.target

[Service]
ExecStart=/usr/bin/Xvfb :99 -screen 0 1024x768x24

[Install]
WantedBy=default.target

Insync

Create a file /home/euikook/.config/systemd/user/insync.service

[Unit]
Description=insync on start up
After=xvfb.service

[Service]
Type=forking
Environment="DISPLAY=:99"
ExecStart=/usr/bin/insync start

[Install]
WantedBy=default.target

Enable unit file

systemctl --user enable xvfb.service
systemctl --user enable insync.service

Enable Lingering

loginctl enable-linger ${USER}
loginctl show-user ${USER} | grep Linger

Post reboot

systemctl --user status xvfb.service
systemctl --user status insync.service
ps ef |grep insync

Shrink dynamically extended VirtualBox image for export appliance

Shrink dynamically extended VirtualBox image for export appliance

Cleanup your system System

Cleanup APT cache

sudo apt-get clean
sudo rm -rf /var/lib/apt/lists/*

Cleanup docker cache (Optional, if you need)

docker system prune -a -f

Uninstall snap (Optional, if you need)

sudo apt-get autoremove --purge snapd 

Cleanup Logs (Optional, if you need)

for f in $(find /var/log -type f); do 
    sudo cat /dev/null > $f;
    echo "  Log $f has been cleared";
done

Shutdown system and boot using ubuntu installation image.

After finish boot. Just press ALT+F2 switch to virtual terminal #2 end press Enter.

Set to zero free block using zerofree command.

sudo zerofree /dev/sda2

and shutdown your system

sudo shutdown -h now

Export Virtual Machine

Using export wizard.

command line interface

Check virtual machine name using vboxmanage list vms

vboxmanage list vms
vboxmanage export $VM_NAME -o $IMG_NAME

Replace $VM_NAME with virtual machine name did you want to export.

Replcae $IMG_NAME to output file name did you want. e.g. ubuntu-bionic-server.ova

리눅스에서 한/영 전환키 사용하기

문제점

  • 영문 키보드 구입
  • 오른쪽 Alt 키 (Alt_R)을 한글 키로 사용 하고 싶음.
  • IBus 등에서 한/영 변환을 Alt_R 키로 등록
    • 다른 프로그램에서는 잘 동작.
    • Alt_R 키를 단축키로 사용하는 프로그램(Chrome)등에서는 동작이 안됨
  • Ctrl_R은 Hanja 키로 매핑 시키고 싶지 않음.

Gnome Tweak Tool 사용

Gnome Tweaks Tool을 실행한다.

Gnome Tweaks Tool

우측 메뉴에서 Keyboard & Mouse를 선택한 후 우측 설정 화면에서 Additional Layout Options 버튼을 클릭한다.

Gnome Tweaks Tool

Additional Layout Options 설정 화면에서 Korean Hangul/Hanja Keys 메뉴를 클릭하여 확장한 후 Make right Alt a Hangul Key를 선택한다.

Gnome Tweaks Tool

Gnome Tweak Tool 시용 시 문제점

잘 동작한다. 하지만 Ctrl_R 키 까지 한자키로 매핑되어 VirtualBox 사용시 Host Key를 변경 해주어 야 한다. 한/영 전환키와 한자 전환키의 설정이 분리 되었다.

이 방법을 사용하자.

Xmodmap 사용

Hangul key

xmodmap -e 'remove mod1 = Alt_R' # Alt_R의 기본 키 매핑 제거
xmodmap -e 'keycode 108 = Hangul' # Alt_R을 Hangul 키로 매핑

Hanja Key

xmodmap -e 'remove control = Control_R'
xmodmap -e 'keycode 105 = Hangul_Hanja'

Save permanently

xmodmap -pke > ~/.Xmodmap

Xmodmap 사용 시 문제점

ubuntu 18.04이후 부터 XKB가 기본 키보드 매핑 패키지로 바뀌면서 위의 xmodmap 설정이 자동으로 적용되지 않는다.

자동적용을 위해서는 아래의 XKB 사용 항목을 참고한다.

XKB 사용

Edit /usr/share/X11/xkb/symbols/altwin

// Meta is mapped to second level of Alt.
partial modifier_keys
xkb_symbols "meta_alt" {
    key <LALT> { [ Alt_L, Meta_L ] };
    key <RALT> { type[Group1] = "TWO_LEVEL",
                 symbols[Group1] = [ Alt_R, Meta_R ] };
    modifier_map Mod1 { Alt_L, Alt_R, Meta_L, Meta_R };
//  modifier_map Mod4 {};
};
// Meta is mapped to second level of Alt.
partial modifier_keys
xkb_symbols "meta_alt" {
    key <LALT> { [ Alt_L, Meta_L ] };
    key <RALT> { type[Group1] = "TWO_LEVEL",
                 symbols[Group1] = [ Hangul ] };
    modifier_map Mod1 { Alt_L, Alt_R, Meta_L, Meta_R };
//  modifier_map Mod4 {};
};

References

쉘에서의 큰따옴표와 작은따옴표(인용부호, Quoting) 그리고 백슬래쉬(Baskslash)

쉘에서 사용되는 세가지 인용법에 대하여 알아보자.

SHELL에서 인용(Quoting) 이란?

쉘에서 인용(Quoting) 은 특정 문자나 단어가 가지는 특별한 의미(또는 기능)를 제거 하는데 사용된다. 예를 들어 빈칸(white space) 은 쉘에서 인자를 구분하는데 쓰이지만 Quoting빈칸(<whitespace>) 매개변수를 구분하는 기능이 무시된다.

쉘에서 Quoting 메커니즘은 세가지가 있다.

  • 이스케이프 문자(Escape Character): Hello\ World
  • 작은따옴표(Single Quotes, '): 'Hello World'
  • 큰따옴표(Double Quotes, "): "Hello World"

Hello\ World, 'Hello World' "Hello World" 이 세가지 모두 하나의 매개변수로 취급 한다.

쉘에서 아래 명령을 실행해 보자. 다음 명령은 매개변수의 갯수를 나타내는 변수 $# 를 출력한다.

sh -c 'echo $#' Hello World
sh -c 'echo $#' Hello\ World
sh -c 'echo $#' 'Hello World'
sh -c 'echo $#' "Hello World"

결과를 보자.

$ sh -c 'echo $#' echo Hello World
1
$ sh -c 'echo $#' echo Hello\ World
0
$ sh -c 'echo $#' echo 'Hello World'
0
$ sh -c 'echo $#' echo "Hello World"
0

백슬래쉬(Backslash, \)

', 또는 "로 둘러 싸이지 않은 백슬래쉬(Backslash, \)는 이스케이프 문자이다. <newline>을 제외하고 백슬래쉬 다음에 오는 문자(Character)의 리터럴 값을 유지 한다. 앞에서도 설명 하였지만 빈칸(<whitespace>) 은 쉘에서 매개변수를 구분하는 구분자로 쓰이지만 백슬래쉬 다음에 위치 하면 원래의 문자의 본래 의미인 빈칸이 된다.

<newline>의 경우는 조금 다르게 처리 되는데 \<newline> 쌍이 나타나면 \<newline>은 라인이 계속 되는것으로 처리 된다. (즉 입력 스트림에서 제거되어 무시된다.)

예를 들어 아래 명령을 실행 해 보자.

echo Hello \
World

<newline> 이 이스케이프문자인 \로 인해 이스케이프 되었다. 앞선 빈칸의 경우와 같이 <newline>의 리터럴 값을 유지 한다면 아래와 같이 두 라인으로 출력 되어야 한다.

Hello 
World

하지만 결과 값은 아래와 같이 <newline> 무시되어 하나의 라인으로 출력되는것을 볼 수 있다.

Hello World

작은따옴표(Single Quotes, ')

작은따옴표(')로 묶인 문자열 속의 각 문자는 자신의 리터럴 값을 유지한다. 따라서 backslash로 이스케이프 하는 경우에라도 작은따옴표 사이에는 작은따옴표를 사용할 수 없다.

큰따옴표(Double Quotes, ")

큰따옴표로 묶인 문자열 속의 각 문자는 $, `, \ 를 제외하고 자신의 리터럴 값을 유지 한다.

큰따옴표 안에 있는 $ + 'STRING' 은 매개변수로 치환된다.

따라서 아래 두 명령은 완전 다른 결과를 나타낸다.

GREETING="Hello World" 
sh -c "echo $GREETING"

큰따옴표로 묶였기 때문에 $GREETINGHello World로 치환되어 새로운 SHELL로 echo Hello World가 전달된다. 따라서 명령의 결과로 Hello World 출력된다.

GREETING="Hello World" 
sh -c 'echo $GREETING'

작은따옴표로 묶였기 때문에 $GREETING이 치환되지 않고 리터럴 값 그대로 인자로 넘어 가 새로운 쉘 에서 echo $GREETING 명령이 실행 되지만 새로운 쉘에서는 $GREETING 변수가 정의 되어 있지 않으므로 빈라인이 출력된다.

References

공개키 암호화 방식이란? (Waht is Public-Key cryptography)

공개키 암호화 방식 (Public-Key cryptography)

암호화와 복호화에 같은 키를 사용하는 대칭키 암호화 방식과 달리 암호화와 복호화에 서로 다른 키를 암호화 방식을 의미한다. TLS/SSL에서 사용되는 RSA가 대표적인 공개키 암호화 방식의 대표적인 예이다.

공개키 암호화 방식의 대 전제는 다음과 같다.

공개키로 암호화한 정보는 개인키로만 복호화 할 수 있고 개인키로 암호화 한 정보는 공개키로만 복호화 할 수 있다.

암호화와 복호화에 사용되는 키다 서로 다르기 때문에 비대칭키 암호화 방식이라고도 불린다.

공개키 암화화 방식의 대표적인 용도는 다음과 같다.

  • 암호화된 통신을 원하는 두 단말 사이에 암호화를 대칭키를 전달하는 전달하는 용도로 사용된다. (TLS)
  • 전달하고자 하는 문서(파일 또는 정보)의 작성자를 증명(서명)하는 용도 와 해당 쩡보가 허가 되지 않은 사용자에 의해 변조 되지 않음(무결성)을 증명하는 용도로 사용된다.

통신에서는 공개키 암호화 방식은 대칭키 암호화 방식(비밀키 암호화 방식)에 비해 연산량이 훨신 많고 하드웨어로 구현하기가 대칭키 암호화 방식(대표적으로 AES)에 비해 까다롭기 때문에 서버의 인증(필요하다면 단말의 인증을 포함하는)과 세션 전체의 보호를 위해 사용되지 않고 이후 통신에 사용될 대칭키를 교환하는 용도로 사용된다.

대칭키(비밀키) 암호화 방식의 경우 연산이 단순하고 반복적인 연산이 대부분이라 하드웨어로 구현하기도 용의하기 때문에 아주 예전의 CPU가 아니라면 기본적으로 많이 사용하는 대칭키 암호화 알고리즘이 하드웨어 적으로 구현되어 있어 암호화 연산을 소프트웨어 적으로 처리 하지 않고 하드웨어에서 처리되는 하드웨어 오프로딩 기능을 제공한다. 따라서 공개키 암호화 방식 보다 매우 빠르고 효율적으로 암호화 및 복호화를 할 수 있다.

암호화의 방법은 다음과 같다.

AB사이에 비밀 정보를 전달하고자 할 경우를 가정하자.

  1. B는 문서를 암호화/복호화를 위한 공개키와 개인키를 만든다. 공개키는 암호화에 사용되고 개인키를 복호화에 사용된다.
  2. AB에게 정보를 전달하기 앞서 B가 생성한 공개키를 취득한다. (보통 BA에게 전송해 준다.)
  3. A는 평문인 정보를 B의 공개키로 암호화 한다.
  4. A는 암호화 된 문서를 B에게 전달한다.
  5. B는 자신의 개안키로 정보를 복호화한다.

이 방법은 TLS/SSL에서 브라우저와 사용자 사이에 세션키(대칭키, 비밀키)를 공유 하기 위한 키 교환 과정에서 활용된다.

개인키로 암호화 한 정보를 공개키로 복화화 하는 반대의 경우도 생각 해 볼 수 있는데 공개된 공개키로 아무나 복호화 할 수 있기 때문에 아무 소용이 없을 것 같지만 개인키와 쌍인 공개키로만 복호화 할 수 있기 때문에 해당 정보의 출처를 인증하는데 사용할 수 있다. 이러한 방식을 전자 서명이라고 한다.

전자 서명 방식은 다음과 같다.

A가 자신이 만든 문서의 출처가 자신음을 증명 하고자 한다.

  1. A는 문서의 서명을 위한 공개키와 개인키를 만든다. 개인키는 암호화에 사용되고 공개키는 복호화에 사용된다.
  2. A는 서명하고자 하는 문서의 해시(HASH)를 생성하고 해시를 자신의 개인키로 암호화(서명) 한다.
  3. A는 문서를 암호화된 해시(서명)와 같이 A에게 전송한한다.
  4. A가 서명한 문서를 취득한 B는 서명을 공개키로 해당 문서를 복호화 하고 자신이 생성한 해시 값과 비교한다.
  5. 복호화 된 해시 값과 자신이 생성한 해시 값이 같다면 이 문서가 A가 생성 하였으며 변조 되지 않았음을 알 수 있다.

이 방법은 우리가 흔히 알 고 있는 은행 업무등에 사용되는 공동인증서(공인인증서)와 TLS/SSL에서 서버에서 수신한 공개키 인증서의 검증에 사용된다.

전자 서명은 위와 같이 문서의 출처와 무결정을 검즘 해 주는 용도 외에 A가 문서에 서명에 사용한 개인키는 A만 가지고 있으므로 A가 해당 문서에 대한 소유권을 부인할 때 이를 방지 하는 용도로 할 수 있다. 이러한 기능을 부인방자 라고 하고 전자상거래나 은행거래 시 신뢰할 수 있는 기관에서 발행한 인증서로 전자 서명을 받는 가장 큰 이유다.

자 이제 공개키와 개인키로 암호화 하고 복호화 하는 방법과 전자 서명을 어떻게 하는지 알았다. 다음으로 넘어가 보자.

지금까지 우리는 암호화나 전자서명의 검증에 사용한 공개키가 올바른 인증서인지에 대해서는 이야기 하지 않았다.

지금 까지 사용한 공개키가 변조 되었다면? C가 자신의 공개키를 A의 공개키라고 속이고 배포 하였거나 B가 가지고 있던 A의 공개키를 자신의 공개키로 변조 하였을 경우 BC가 보낸 잘못 된 정보를 A가 보낸 정보라고 믿게 되는 문제가 발생할 수 있다.

이러한 문제를 해결하기 위해 BA의 공개키가 정말 진짜로 A가 배포 하였는지에 대하여 검증 할 필요가 생겼다.

간단하게 생각해보자. AB 모두가 신뢰할 수 있는 DA의 공개키에 자신의 개인키로 서명하고 이 서명과 같이 공개키를 공개 한다면 A의 공개키를 받은 B는 자신이 신뢰하는 D의 공개키로 A의 공개키를 검증 할 수 있다고 생각할 수 있다. 그러면 D의 공개키는 누가 검증주나요? 라는 질문을 받게 되면 우리는 공개키 암호화 방식을 신뢰 하기 위해서는 어느 수준지 검증 해야 하는지에 대한 의문이 생길 수 밖에 없다. 하지만 이러한 문제는 대부분 명확한 답이 없고 명확한 답이 없을 때 우리는 사회적으로 합의된 정책과 규제 와 기업들의 컴플라이언스를 통해 풀게 된다.

앞에서 설명한 신뢰 할 수 있는 공개키 암호화 방식을 효율적으로 관리 하게 위해 만들어 진 것이 PKI(Public Key Infrastructure)이고 한글로 공개키 기반구조이다.

  • Public Key Infrastructure

공개키 기반구조(public key infrastructure, PKI)는 디지털 인증의 생성, 관리, 배포, 사용, 저장, 파기와 공개키 암호화의 관리에 쓰이는 일련의 역할, 정책, 하드웨어, 소프트웨어, 절차의 총칭으로 전자 상거래, 인터넷 뱅킹, 민감한 정보를 담은 이메일을 포함한 다양한 네트워크 활동에 있어 정보의 안전한 전송이 목적이다. 통신 주체를 식별하거나 오가는 정보를 검증함에 있어 단순한 암호를 넘어선 엄격한 확증이 필요한 경우에 중요한 역할을 한다. 암호학적으로는 공개된 키를 개인이나 집단을 대표하는 적절한 주체와 엮는 것이며 이는 인증 기관(Certificate authority, 이하 CA)에의 등록과 해당 기관에 의한 인증의 발행을 통해 성립된다. 이 엮음은 보증의 정도에 따라 완전 자동으로 성립되기도, 사람 손을 거쳐야만 성립되기도 한다. Wikipedia 에서 발최

앞에서 설명한 바와 같이 공개키를 검증 할 수 있는 방법이 필요하게 되었다.

PKI의 정의에 따르면 인증기관(CA, Certificate Authority) 이 사용자의 공개키에 대한 (디지털)인증서(Certificate, CA의 개인키로 서명한것) 발급한다) 이 인증서는 인증서에 포함된 공개키와 정보(소속, 국가, 위치 등)가 틀림 없음을 증명해 준다.

CA는 공개키와 비밀키를 만든다. 공개키는 퍼플릭 도메인에 공개된다.

A가 공개키와 비밀키를 만들었다. 공개키를 공개 하기전에 CA에게 자신의 공개키와 키에 대한 정보를 주면서 해당 공개키의 인증을 요청한다. CA는 요청을 받으면 A가 준 공개키와 정보들의 지문(SHA과 같은 방법으로 해시)을 만들어 지문을 자신의 비밀키로 암호화 하고 암호화된 지문 정보와 공개키를 합쳐 인증서를 생성한다.

이제 A가 받은 인증서는 CA의해 인증 되었다.

BA의 인증서가 유효한지 판단 하는 방법은 다음과 같다. 앞서 설명한 바와 같이 CA는 공개키를 공개 하였고 그 공개키는 B도 가지고 있다. BA가 준 인증서를 받아 CA가 했던 방법과 같은 방법으로 만든 지문(해싱한 결과) 과 인증서에 포함되어 있던 CA의 개인키로 암호화된 지문 정보를 CA의 공개키로 복호화 한값을 비교 하여 두 지문 정보가 같으면 해당 인증서가 유효하다고 판단한고 같지 않으면 유효하지 않은 인증서로 판단한다.

그렇다면 CA의 공개키는 어떻게 검증 할 것인가? 라는 의문이 생긴다.

앞서 A의 인증서를 인증한 방법과 같은 방법으로 CA의 인증서를 인증 하면 될것 같은 생각이 든다. CA의 공개키를 인증해주는 CA를 상위 CA이라고 한다.

CA를 인증한 CA의 공개키는 누가 인증하는가? 이라는 자연 스러운 의문이 생긴다.

이러한 문제를 해결하기 위해 PKI에서는 최상위 인증기관인 루트 인증기관(Root CA) 을 정의 하였다. 이 Root CA 에서 루트 인증서(Root Certificate) 를 발행 하고 이 루트 인증서중간 인증기관(Intermediate CA) 의 인증서를 인증하는 데 사용된다.

루트 인증서는 자신의 공개키를 인증해 줄 상위의 CA가 없기 때문에 자신이 직접 인증한(Self-Signed)인증서이다.

Root CA는 매우 강력한 보안으로 자신의 개인키를 관리하고 있기 때문에 안전하다고 간주하기로 약속하였다.

Root CA와 하나 또는 여러개의 Intermediate CA를 거쳐 최종 사용자의 공개키를 인증하는 일련의 과정을 인증서 체인 Certificate Chain 또는 Chain of Trust 이라고 한다.

최종 사용자의 인증서에는 Root 인증서 부터 최종 사용자의 인증서를 인증한 CA의 인증서까지의 인증 정보가 모두 포함되어 있다.

Python - Set 과 List 그리고 Tuple

Set(집합) 이란?

Python 내장 데이터 타입이다.

A set object is an unordered collection of distinct hashable objects.

해시 가능한 반복가능 하고 변경 가능하며 중복요소가 없는 데이터 유형의 정렬되지 않은(순서가 지정되지 않은) 컬렉션이다.

일반적으로 포함테스트(a in sets), 중복제거, 교집합, 합집합, 차집합, 대칭차와 같은 수학적 계산에 사용된다.

List, Tuple과의 차이

List, Tuple 은 순서가 있는(ordered) 컬렉션이지만 Set은 순서가 없은 컬렉션이다.

ListTuple의 차이는 가변성에 있다. List은 초기화 이후에 수정 수 있으나 Tuple은 초기화 이후에 수정할 수 없다.

특징

임이의 값이 컬랙션에 포함되어 있는지 테스트 하는 경우 리스트에 비해 월등히 빠른 성능을 보여 준다.

Hash로 관리 되기 때문이다.

fruits = {'Apple', 'Banana', 'Coconut', 'Durian'}

while True:
    fruit = input("Enter your preferred fruit name.? ")    
    if fruit in fruits:
        print(f"{fruit}s are in stock")

iteration 연산의 경우 리스트에 비하여 느리거나 비슷한 성능을 보인다.

fruits = {'Apple', 'Banana', 'Coconut', 'Durian'}

for fruit in fruits:
    print(fruit)

초기화

빈 집합 초기화 하기

fruits = set([])

중괄호를 이용한 초기화도 기능한다.

fruits = {}

초기값을 가지는 초기화

fruits = set(['Apple', 'Banana', 'Coconut', 'Durian'])

중괄호를 이용한 초기화 역시 가능하다.

fruits = {'Apple', 'Banana', 'Coconut', 'Durian'}

요소 추가 및 삭제

요소 추가하기 add() 메서드를 사용한다.

fruits.add('Elderberries')

요소 제거하기

remove() 메서드를 사용한다.

fruits.remove('Elderberries')

discard() 메서드를 사용할 수도 있다.

fruits.discard('Elderberries')

remove() 메서드의 경우 해당 키가 없을 경우 KeyError예외가 발생하지만 discard() 메서드의 경우 집합에 해당 키가 없을 경우 무시된다.

변환

List to Set

fruits = set(['Apple', 'Banana', 'Coconut', 'Durian'])

Set to List

fruits = set({'Apple', 'Banana', 'Coconut', 'Durian'})

수학적 연산

교집합(&)

교집합 - Wikipedia

stock = {'Apple', 'Banana', 'Coconut', 'Durian'}
wants = {'Banana', 'Coconut', 'Figs'}

to_buying = stock & wants

to_buying변수는 다음과 같은 값을 가진다.

{'Coconut', 'Banana'}

합집합(|)

합집합 - Wikipedia

stock = {'Apple', 'Banana', 'Coconut', 'Durian'}
wants = {'Banana', 'Coconut', 'Figs'}

all_fruits = stock | wants

all_fruits변수는 다음과 같은 값을 가진다.

{'Figs', 'Coconut', 'Durian', 'Apple', 'Banana'}

차집합(-, difference)

차집합 - Wikipedia

stock = {'Apple', 'Banana', 'Coconut', 'Durian'}
wants = {'Banana', 'Coconut', 'Figs'}

remain_fruits = stock - wants

remain_fruits변수는 다음과 같은 값을 가진다.

{'Apple', 'Durian'}

대칭차(^, symmetric_difference)

대칭차 - Wikipedia

stock = {'Apple', 'Banana', 'Coconut', 'Durian'}
wants = {'Banana', 'Coconut', 'Figs'}

differences = stock ^ wants

differences변수는 다음과 같은 값을 가진다.

{'Figs', 'Durian', 'Apple'}

Examples

stock = {'Apple', 'Banana', 'Coconut', 'Durian'}
wants = {'Banana', 'Coconut', 'Figs'}

print(f"intersection: {stock & wants}") # 교집합
print(f"union: {stock | wants}") # 합집합
print(f"difference: {stock - wants}") # 차집합
print(f"symmetric difference: {stock ^ wants}") # 대칭차
intersection: {'Banana', 'Coconut'}
union: {'Banana', 'Apple', 'Durian', 'Coconut', 'Figs'}
difference: {'Apple', 'Durian'}
symmetric difference: {'Apple', 'Durian', 'Figs'}

Run Gitlab Runner in a container

Run Gitlab Runner in a container

Prerequisites

Usages

Clone Repository

git clone https://gitlab.com/euikook/gitlab-runner-compose.git

Configuration

  • Replace CI_SERVER_URL value with your Gitlab server e.g. https://gitlab.com
  • Obtain a token for a shared or specific Runner via GitLab’s interface and replace REGISTRATION_TOKEN value
tee .env << END
CI_SERVER_URL=https://gitlab.com/
REGISTRATION_TOKEN=zDsz34JuZf95NoBaQPX
END

Registration and run gitlab-runner

docker-compose up -d

References

Keep persistent SSH session using autossh and cron

Keep persistent SSH session using autossh and cron

Background Knowledge

SSH Tunneling

  • Local Port Forwarding: used to forward a port from the client machine to the server machine.
  • Remote Port Forwarding:

Local Port Forwarding

ssh -L [bind_addr:]port:target_addr:target_port user@server
  • bind_addr
  • port
  • target_addr
  • target_port
  • user
  • server

Remote Port Forwarding

ssh -R [bind_addr:]port:target_addr:target_port user@server
  • bind_addr
  • port
  • target_addr
  • target_port
  • user
  • server

Please see http://dirk-loss.de/ssh-port-forwarding.pdf

Prerequisites

  • autossh
sudo apt-get install autossh

Server Side

Add User for SSH tunneling

sudo adduser --system --shell /bin/false --gecos "Auto SSH" --disabled-password --home=/home/autossh autossh

Generate SSH key

sudo -u autossh ssh-keygen -t rsa -b 4096 -f ~/.ssh/autossh

Copy public key to ~/.ssh/authorized_keys

sudo -u autossh cp ~/.ssh/autossh.pub ~/.ssh/authorized_keys

Append Follwing Configuration to /etc/ssh/sshd_config

if did you want Local Port Forwarding please set GatewayPorts to yes.

Match User autossh
   ...
   GatewayPorts no
   ...

Restart SSH daemon

sudo systemctl restart ssh

Client Side

Copy SSH private key to client host

scp 1.2.3.4/.ssh/autossh ~/.ssh/autossh

Install autossh

sudo apt install autossh

Add SSH Client Configurations

Append following config to ~/.ssh/config

Replace 1.2.3.4 to real IP or hostname

for Local Forwarding

only allowed if GatewayPort=yes (default: no) in server configuration.

LocalForward 2222 localhost:22

for Remote Forwarding

RemoteForward** 2222 localhost:22

Test SSH connection

autossh -M 0 -f -N autossh

Verify SSH Connection

Check listen port in your system.

for Local Port Forward (in Server)

netstat -lnt

for Remote Port Forward (in Client)

netstat -lnt
ps aux |grep autossh

Copy autossh-bot to ~/bin

mkdir -p ~/bin
cp ./bin/auto-ssh-bot ~/bin

Register cron job

crontab -e

Schedule cron job to every 5 minutes

0/5 * * * * ~/bin/auto-ssh-bot